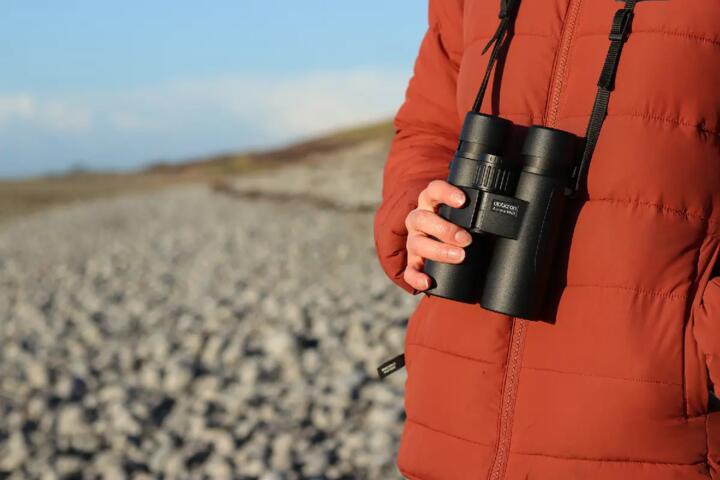
Binocular Eye Relief
Binocular eye relief is the distance from the eyepiece lens to your eye at which the image remains fully visible and in focus. Safari use often involves long periods of scanning for animals at dawn and dusk, so a poor fit turns into eye strain and repeated re-positioning. If you wear glasses, eye relief also determines whether you can see the full field without pressing your frames into the eyecups. Many binoculars list an eye relief value in millimeters, but the usable comfort depends on how the eyecups fold, the shape of your face, and how you hold the binocular steady.
In practice, eye relief interacts with three other fit variables: eyecup design, diopter adjustment range, and interpupillary distance (IPD). Eyecups that don’t extend far enough can force your eyes too close, which reduces the visible field and can cause vignetting. Diopter settings matter because you may focus one eye slightly differently after you adjust for your vision. IPD affects how the two optical paths align; even with perfect eye relief, a mismatch can cause fatigue and double images.
A quick aside from packing lists: on a 2024-10 trip I watched a group lose time because everyone tried to “eyeball” alignment while standing in wind and dust, which made the fit problem feel like a focusing problem. The binoculars were fine; the eye position wasn’t. That is the practical boundary where eye relief becomes a safari specification rather than a spec-sheet detail.
Main Problems And Pain Points
People often treat eye relief as a single number that guarantees comfort, then discover the binocular still feels wrong after they step outside. The first common mistake is assuming that the listed eye relief applies equally to glasses wearers. Manufacturers measure eye relief under controlled conditions, and real-world fit changes when eyecups are folded down, when you use a hat brim, or when your glasses sit farther from your eye than the manufacturer’s test setup.
The second mistake is ignoring eyecup behavior. Some binoculars have twist-up eyecups with limited extension, and others have rubber cups that collapse when you press them against your face. If your eye relief requirement is near the upper end of the binocular’s range, a small change in how you seat the eyecups can cut off part of the field of view. That “missing edges” effect can look like a focus issue, especially when you are tracking a moving subject.
The third pain point is mixing up eye relief with exit pupil. Eye relief affects where your eye must sit; exit pupil affects how much light enters and how forgiving the binocular is when your eye position drifts. A binocular can have generous exit pupil but still demand precise eye placement. During safari, vehicle vibration and uneven terrain make that drift more likely, so both parameters matter, just not in the same way.
Supporting technologies also shape the experience. Roof prism binoculars often use dielectric or metallic coatings to improve contrast, but coatings do not fix fit. The diopter system helps you match focus between eyes, yet it cannot compensate for an eye position that clips the field. Even the strap design matters: a loose strap can let the binocular bounce, and then your eyes chase the image rather than the animal.
Solutions And Advice
Match Eye Relief To Glasses
Start by measuring your own “glasses-to-eye” distance. A simple method is to hold a ruler at arm’s length and estimate the gap from the eyeglass lens surface to your eye when you wear the glasses normally. Then compare that with the binocular’s stated eye relief and the eyecup extension you plan to use. If you plan to keep eyecups folded down, treat the effective eye relief as shorter than the spec suggests.
As a practical target, many glasses wearers look for around 16–20 mm of eye relief for comfortable full-field viewing, though the right number varies by frame thickness and how far your glasses sit from your face. If you are near the margin, test in-store or at a demo session. A version detail that matters: some binocular lines revise eyecup geometry between model years, so “same brand, different year” can change usable eye relief even when the spec reads similarly.
Test With Realistic Safari Use
Test the binocular in conditions that resemble safari viewing: low light, bright highlights, and a moving target. Focus on whether the full field remains visible while you gently move the binocular left and right. If you see black crescents at the edges, you are too far or too close, which points back to eye relief and eyecup seating.
Use your actual holding posture. Many people test while standing still, then struggle in a safari vehicle where elbows float and the binocular angle changes. If you have a tripod adapter, try it, but remember that a tripod can change your eye position relative to the eyepieces. On a 2023-06 demo, I saw a visitor get a perfect fit on a counter, then lose the field when they switched to a seated stance with a hat brim.
Adjust Diopter And IPD First
Before judging comfort, set IPD and diopter. IPD is the distance between your pupils; if it is off, your eyes work harder to fuse the image, which can mask a fit problem. Diopter adjustment should be done with the binocular at the same eye position you will use during viewing. If you adjust diopter while your eyes are too close to the eyecups, the final focus can feel inconsistent once you move to the correct eye relief position.
After setting diopter, do a quick check: look at a high-contrast edge and then shift your eye slightly within the eye relief range. If the image stays sharp across that small movement, the binocular is forgiving. If sharpness collapses quickly, you will feel it during vehicle vibration.
Balance Eye Relief With Exit Pupil
Exit pupil is the diameter of the light beam leaving the eyepiece. It equals objective diameter divided by magnification, and it affects how tolerant the binocular is when your eye position drifts. For dusk and dawn, larger exit pupil can help maintain a bright image, but it does not replace eye relief. A binocular with short eye relief can still frustrate you even if the exit pupil is generous.
When comparing models, treat eye relief as the “fit distance” and exit pupil as the “forgiveness.” If you expect to view from a moving vehicle, prioritize forgiving eye placement and stable alignment. If you plan to use glasses, prioritize eye relief and eyecup extension first, then check exit pupil for low-light comfort.
Case Examples
Scenario 1: Glasses wearer with clipped field. A traveler with medium-thickness frames buys a compact 8x binocular with 14 mm eye relief on the spec sheet. In the shop, they see a full image with eyecups folded down, but on safari they notice dark edges after a few minutes. The cause is consistent: their glasses sit farther from the eye when seated, and the eyecups do not extend enough to keep the eye at the correct distance. The fix is switching to a model with longer eye relief and twist-up eyecups that lock at a higher position.
Scenario 2: No-glasses user misreads focus. Another traveler uses a 10x binocular with adequate eye relief but sets diopter while leaning forward. During viewing, the binocular bounces slightly and the traveler’s eyes drift, causing vignetting that looks like blur. They adjust focus repeatedly, but the real issue is eye position. After re-setting IPD and diopter while seated in the same posture used in the vehicle, the image stabilizes and the “blur” disappears.
Comparison Table And Checklist
| Fit Factor | What To Check | Good Sign | Red Flag |
|---|---|---|---|
| Eye Relief (mm) | Compare spec to your glasses-to-eye distance and planned eyecup position | Full field visible without pressing frames into eyecups | Edge darkening or frequent re-centering |
| Eyecup Extension | Test twist-up height and whether cups collapse under pressure | Eyecups hold a consistent eye position | Field changes when you relax your grip |
| IPD Setting | Set IPD before diopter; verify fusion of a distant edge | No double image during small head movements | Eye strain within minutes |
| Exit Pupil | Check for low-light comfort at your magnification | Image stays bright when your eye position drifts slightly | Dim image plus tight eye placement |
- Set IPD to your pupils’ distance and lock it if the model allows.
- Adjust diopter using a distant target while holding the binocular at your intended eye position.
- Use your planned eyecup position (up for glasses, down for bare-eye) and confirm the full field.
- Move the binocular slightly left/right without changing head position; watch for edge darkening.
- Repeat while seated, since safari viewing often happens from a vehicle seat.
Common Mistakes
One mistake is buying based on magnification alone. Higher magnification can reduce the size of the exit pupil and make eye placement more sensitive, which increases the chance of vignetting when your eye drifts. Another mistake is ignoring how the binocular feels after 10–15 minutes. Eye relief problems often show up as a dull ache around the brow or a need to “chase” the image.
People also confuse “folded eyecups” with “better fit.” Folded eyecups can shorten the effective eye relief and force your eyes too close. If you wear glasses, folded eyecups often create a mismatch between your glasses-to-eye distance and the binocular’s usable eye relief range. A final mistake is adjusting diopter while your eyes are not positioned correctly; that can make the binocular feel inconsistent across sessions.
FAQ
How Do I Measure Eye Relief Needs?
Estimate the distance from your glasses lens surface to your eye when you view normally, then compare it to the binocular’s stated eye relief and the eyecup position you will use.
Does Eye Relief Change With Eyecups?
Yes. Twist-up or fold-down eyecups change where your eye sits relative to the eyepiece, which can shift the usable field even when the printed eye relief stays the same.
Is Longer Eye Relief Always Better?
Longer eye relief usually helps glasses wearers, but it does not fix other fit issues like IPD mismatch or an eyecup design that collapses under pressure.
What Happens If Eye Relief Is Too Short?
You may see dark edges (vignetting), feel pressure from your frames against the eyecups, or experience faster eye strain because your eyes repeatedly re-center.
Does Eye Relief Affect Focus?
Eye relief does not change optical focus settings directly, but incorrect eye position can make the image look soft or uneven, which leads people to adjust diopter unnecessarily.
Author's Insight
Eye relief is a fit specification that determines where your eyes must sit to see the full field. For safari use, the main risk is not optical failure but repeated micro-adjustments caused by eyecup geometry, glasses position, and vehicle posture. A practical evaluation pairs eye relief with IPD and diopter settings, then tests edge visibility while moving the binocular slightly. If you can only test briefly, focus on whether the full field stays visible without pressing glasses into the eyecups.
Key Takeaways
- Eye relief governs where your eye must sit; eyecups and glasses distance decide whether the full field stays visible.
- Set IPD and diopter first, then judge comfort using the same seated posture you will use on safari.
- Edge darkening usually signals an eye-position problem, not a focus problem.
- Compare eye relief alongside exit pupil for low-light tolerance, especially at dawn and dusk.